I’ve wanted a birch tree wall mural for so long… in case you haven’t noticed from my etsy shop, my living room décor, or my pinterest account, I’m a little obsessed with trees, branches, and woodgrain anything. So when I decided to redo my office and I knew it would be my area and I could do whatever I wanted, I determined I had to have a wall-o-trees. I did a lot of research and looked at vinyl tree decals, but I decided since I can make my own tree art with a computer then I should be able to make my own tree wall mural with paint. Here are the two pictures I used as my inspiration (the one on the left is my own art, the one on the right is a vinyl decal.)
The only supplies you need to paint your own birch tree wall are painter’s tape (I love the 2” wide green Frogtape, I think it works so much better than the blue tape), an X-acto knife, and paint.
To begin, tape two straight-ish lines for each tree, flaring them out slightly at the bottom. Don’t push your tape too tightly onto the wall at this point. I just randomly made little groupings of trees, although looking back I wish I had done 1-2 more trees instead of having the two bigger spaces, but I couldn’t go back in and add them without it looking weird and cluttered.

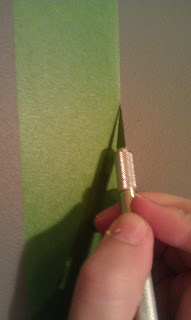
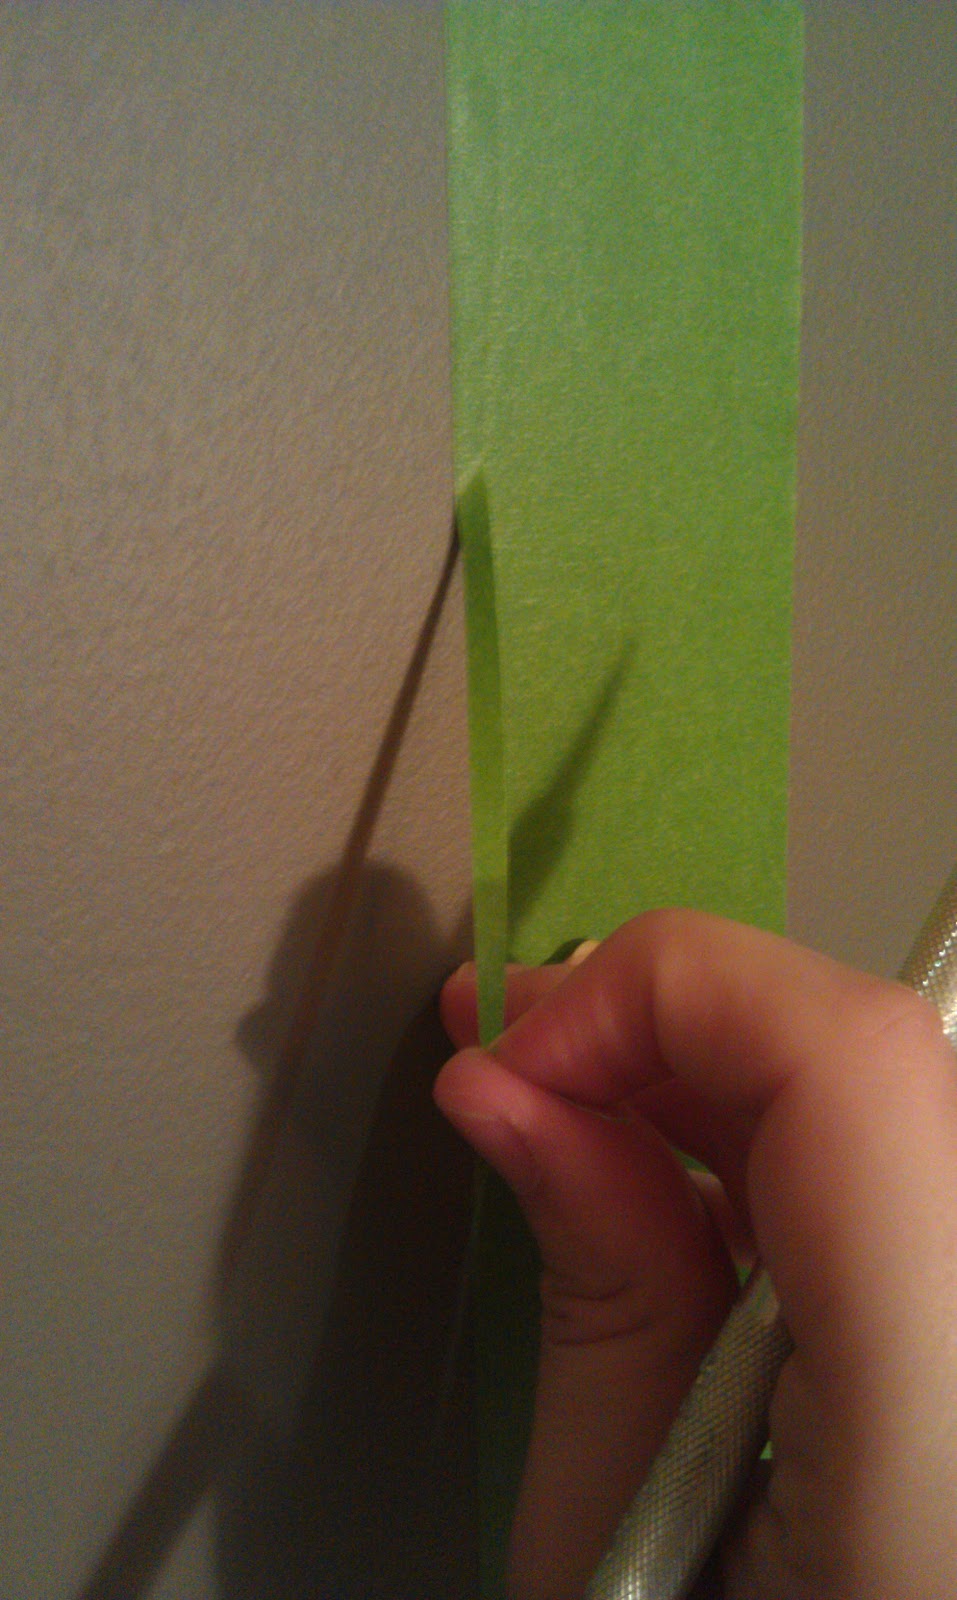
Next, using your X-acto knife, cut slivers of your tape out so your tree isn’t just straight up and down. Think about a real tree and how it has knots sticking out- To begin with, I was just cutting little slivers out of short sections, but by the end I was literally running my X-acto from the very top of the tape to the bottom, weaving slightly in and out as I went down, and it ended up being much easier to remove the tape that way. If you have a brand new super sharp X-acto, you really don’t need to push hard at all on the tape, just lightly score the surface and when you pull off the cut part, it will naturally want to break at your score line.
I did need to go back and re-cut parts that tried to tear at the wrong points, and I did make a couple too- deep cuts in my wall (but you can’t tell now that everything is painted), but I really think if you don’t push the tape down too hard to begin with then the tape-wall bond won’t be as strong and the tearing off part will be easier.

No lie, the taping/cutting part probably only took me about 30 minutes. Just eyeball your trees and then go to town with your X-acto knife.
Next, I decided I wanted a few branches to fill in the spaces between the trees, and I used my tree artwork as inspiration for my branches. Looking at my wall now (and considering the extra work it cost me- I’ll get to that later), I’m not sure I’m in love with the branches. Although someone who has seen it now that it is finished said the branches make it look more like trees (you know, for people who haven’t been lusting over tree walls for years like me, they might not immediately realize that lines on a wall are supposed to be trees). I used my tape to “draw” some rough branch shapes then used my X-acto to cut out the actual shape I wanted. You also have to cut through the part of your original tree’s tape to connect the shapes.
 |
| Making the branch shapes |
 |
| After cutting branches out |
When you are finished with all your cutting, then go around the edge of the tape that you will be painting on and really push down on the tape, trying to adhere it as well as possible to the wall. I use a couple fingers or the heel of my palm and rub back and forth. I’ve also heard of using the bottom of a spoon to go around everything. And just on a side note, if you are doing a smaller project and really want crisp paint lines, you can use clear nail polish along the edge of the tape and let it dry, and it seals the tape line so no paint can get under the seal. I did it when I painted one tree on my niece’s wall, but a lot of trees on a big wall would need a whole lot of nail polish!
Anyway, so now you’re ready to paint! I got my white paint from the Oops bin at Home Depot, $7 for a gallon of Martha Stewart paint, so I think it’s a pretty good deal… not sure why it was in the oops bin, it said “bright white” and the paint looked pretty bright white to me, but maybe they tinted it a little or something.
I painted my first coat with a small paint roller and it looked like this:
Not so great, I know. My husband came downstairs and said “whoa, how many coats are you gonna have to do to cover the gray?”… probably should’ve primed it, but oh well. Well, the answer is three. Three coats of paint. After using the roller for the first coat, I used a paint brush for the second two coats and it really didn’t leave paint strokes and it covered a million times better.

After my third coat of paint, I got to the “birch bark” part of my trees. While my tape was still in place, I just started painting lines with a smaller paint brush… some were more like long U’s, some were just straight, some were more like little sideways U’s, and I made a couple ovals that looked like knots. I just kinda free-handed it on the first tree, then took off the tape after a couple minutes to make sure I liked how it was looking before I did the rest of my trees. A couple tips from a design standpoint: I think it looks a little better if you have more “bark” on one side of all your trees (as in, left instead of right) just because there would be more shadows on one side of your tree in a forest. Also, keep in mind that you can always add more, but you can’t take away (well, I guess you could paint over some lines with your white paint again if you wanted less lines, but that would be extra work.
So, I did my bark on all my trees, and then removed the tape! This is the exciting part, when you really start to see your vision coming together.

I loved my trees… the branches, not so much. They looked all huge and wonky and I was really considering completely painting over them, but then I decided I just needed to make them skinnier. So I freehand painted around them with a smaller paintbrush. I also went back and filled in some of my “bark” with an even smaller round brush to eliminate some of my paint strokes on the ends of my lines where the paintbrush hairs left little trails.
And voila! DIY painted mural birch tree wall.
Next up on my office makeover is DIY painted IKEA storage boxes with a yellow chevron pattern. Here's a sneak peak:


